Removal house advice - where to start?
A removal house is a great way to quickly put a house up on a bare block of land. For us it bypassed all the decision making about the type of house we needed, and it worked out way cheaper.

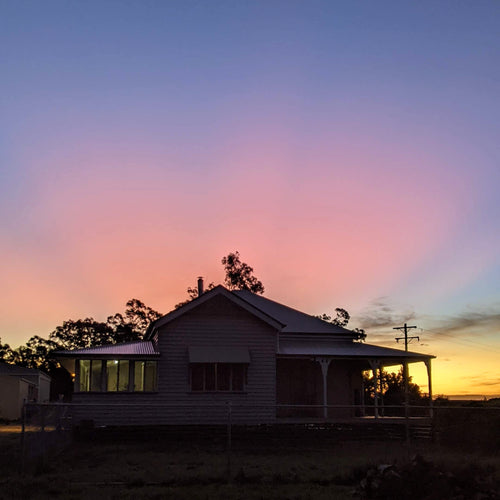
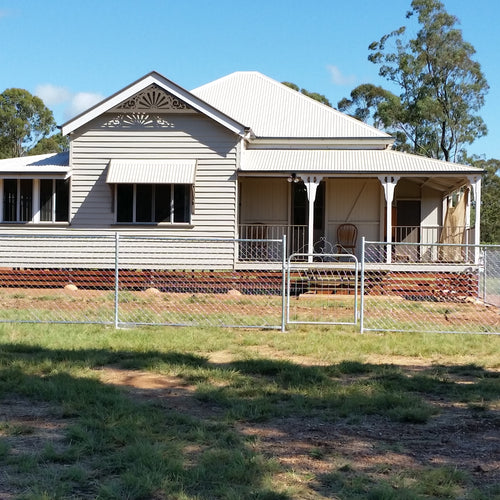
We first saw our secondhand house in December 2012, we moved it to our property in June 2013 and and we moved into the house in April 2017. We did most of the work ourselves over weekends and holidays. If you are considering (or have already bought) a removal house, this is my advice.
You can read more about our secondhand house: Part 1 and Part 2
1. Live somewhere else while you're renovating
We were lucky to be able to live about 30 minutes away from our removal house, so we didn't have to live IN the removal house until it was finished. I knew that we would never finish it properly if we moved in too soon.
If this is an option for you, it will make life so much easier because you can leave all the building mess out and you don't have to worry about ruining furniture with dust and paint etc. If you have to live there, do what you can to separate the area you are working from the area you are living and plan to rotate around until everything is done.
2. Make a detailed plan
We made a list of everything that would need to happen before we could move into the house. This included everything from building the stairs, replacing the roof to installing the washing line. We wrote them on small pieces of paper and then put them in order on a larger page. The plan was stuck to the wall of the house we lived in until we moved, so that we could refer to it regularly.
Our first priority was everything we needed to get the initial council approval for the house. We focused on those items first so that we could get our bond back. That was mostly septic system, electrical connection, stairs and strapping.
When that was done, we started working on the changes that we wanted to make inside. We started sanding and painting one room at a time. Then we demolished the kitchen and bathroom and got the tradies in to help us finish off.
I also had a notebook with running to do lists for each area of the house so I could keep track of things that we needed to buy or jobs that we needed tradies to help with.

|
| This was our plan! We moved items around as needed and ticked off what was finished. |
3. Keep moving forward, but don't over-do it
Some weekends, all we got done was a few hours ripping out carpet. Other weekends we worked all day Saturday and Sunday to get through two coats of primer and ceiling paint in a large room. Those weekends were tough - often I ended up with a claw hand from gripping the paint brush and a sore neck from looking up at the ceiling.
Don't beat yourself up if you can't do a full weekend every week! Just keep chipping away at small jobs on your plan or to-do list until its all done. You will get there eventually!

4. Find good tradies to help you
It makes such a difference if you find good tradies that you can trust to do the job the way you want it. We had an awesome builder who worked hard to make his work match the 100 year old house by salvaging bits of VJ to make new work fit in with the original walls. As we were both at work each day, we couldn't supervise everything they were doing, so it was nice to know that we could trust them to do a great job even when we were not there.
Word of mouth is the best way to find good tradies, so ask around and book them in early. The good ones can be hard to get, but worth the wait.
5. Consider future comfort and running costs
Now is your opportunity to make your house more comfortable through extremes of weather. We orientated our house when we moved it so that we could avoid the hot summer sun. We also changed the roof colour (lighter) and added more insulation in the roof and walls. While we were changing things anyway, we tried to think about how we would be using the house in future.
6. Sell what you don't keep
We managed to sell several items from the house, including the oven and the wood stove. There was nothing wrong with them, they just didn't suit how we wanted to finish the house and was great to see them go to another owner, plus we got some cash to fund the renovation!
7. Start a folder with all your information
I ended up with three folders! One was the first stage with the house removal, site preparation, septic installation, through to council approval. The next folder is the inside of the house - all the fittings and appliances that we put in the kitchen and bathroom, the paint colours and the furniture. The third folder is for the sheds. I kept all the quotes, invoices and manuals together in these folders so that I can quickly find anything I need.
Also if you have any trenches dug or walls exposed - TAKE PHOTOS! These are the boring photos that you are so glad you took when you later wonder where that pipe is buried!
|
|
|
I liked folders! |
8. Home renovation magazines for inspiration
For 4 years it seemed like all I read was home renovation magazines! I bought them and I borrowed them from the library. I showed Pete the bits that I liked and we gradually formed an idea of how we wanted our secondhand house to look.
I didn't use pinterest or instagram so much back then, but that would also be a great way to fine tune your design ideas. When it came to the bathroom and the kitchen, I made digital image boards by cutting images that I liked into one document so that I could focus on each element.
For me it helped to choose a few common themes to maintain throughout the house - brass, wood and easy to clean!

Renovating our secondhand house was hard work, but worth it in the end. I hope that this post can help anyone who is planning to, or currently working on, removing a house.
Do you have any tips to add or any questions for me?
A secondhand house for Cheslen Rise
A tour of our secondhand house (BEFORE)
The story of our secondhand house - Part 1
Choosing insulation for our house
Renovating a Queenslander house
Building the Queenslander house - book review
Stairs for our secondhand house
Removing asbestos from our secondhand house
Another update on our house progress
How to choose exterior paint colours
And one more update on our house progress
Keeping our house warm in winter


Hi,
I really appriciate your effort for sharing such a good information. Thanks for sharing.
information
Great insights on removal house advice! Starting the moving process can be overwhelming, but the tips provided, especially from Removalists Point Cook, offer a fantastic starting point. Clear and practical guidance for a smoother transition. Thanks for sharing!
Leave a comment