Caring for baby chicks
We're still having some trouble with our incubators, but when I work that out, I'll post about incubating eggs. However, when we do managed to hatch some eggs, we've been pretty good at looking after the chicks from then onwards! For those of you with reliable broody hens who take care of the incubation and chick rearing process, you're very lucky and you don't need to know anything about this post! But as we raise Rhode Island Red and White Legborn chickens that are not known for their mothering abilities, we have to do all the work ourselves in order to sustain our little flock.
We collect eggs in spring until we have enough for the first incubator run and aim to hatch about 12 chicks a season, so we do as many runs as we need until we have enough chicks (this should only take one run, but as I mentioned above, it hasn't been easy this year). The aim is to get about 6 new replacement hens and 6 roosters to grow up and eat (and maybe one to replace the old rooster or to sell), give or take a few, this seems to be about the right number. Roast chicken is a bit of a treat here, because its such an effort to kill and dress the birds for dinner, but when we do have them, they taste really good. Anyway, just thought you needed a bit of background info about the number of chicks we're talking about, now back to the chicks.....
After the chicks hatch they need to be kept warm (38degC at first), so they need a nice draft-proof "brooder" box and a heat source. We use a wooden box, but any type of box is fine, I've even seen a cardboard box used. The size depends on the number of chicks, when they get bigger, its surprising how much mess they make too, so even if the box seems huge at first, they will grow into it! For the heat source we've been using an incandescent lightbulb. These used to be $1-2, a great cheap solution, but we can't buy them any more in Australia.
I've been trying to find an alternative heat source (that I can still buy), so I bought a special ceramic heat bulb (150 W) and holder from Planet Poultry. I plugged it in and checked the temperature in the box (before I put the chicks in) and the box got to 60degC, oops! It turned out that the bulb was for 50 chicks! I only had 2 chicks in a small box, so no wonder it was too hot. Then I tried a variable current controller to reduce the temperature, but I think it was just too oversized, as that made no difference to the temperature in the box. Then I ordered a 25 W bulb from another website (made for snakes and reptiles), it fits in the holder I already bought, but they also sell their own, and this time it was TOO COLD! Only getting up to 25degC overnight, which is OK when the chicks are a few weeks old, but too cold when they first hatch. I have now ordered a 60 W bulb, which should work with the current regulator to hold the temperature around 30degC..... The lesson is that it may take a few goes to find the right bulb for your situation, but they will all be useful for something (the small one is good for hot summer nights when the chicks only need a little extra heat). UPDATE the 60 W bulb is great, it sits around 35-40degC, so I've connected it to a thermostat to hold it around 36degC for comfortable chicks. Our box is about 1m long x 0.5m wide x 0.5m deep, made of wood. This should give you an idea of what size bulb might suit your box.
I usually line the box with newspaper and change it every few days as it gets smelly. Then I put the newspaper in the compost bin, complete with chicken poo goodness (sometimes I also soak it in water first, as this helps it to break down, it also helps to rip it up quickly into smaller pieces, however the chicks often help by spilling their water everywhere anyway).
Depending on the time of year, the chicks only need the heat lamp until they have a few feathers. Particularly in summer, we can turn off the lamp after a week and after two weeks they can go outside in a small bird cage. I put them in the garden during the day (just in case the kelpies take an interest in getting the cage open) and out on the grass in the afternoon and then under cover at night. They seem very happy with that! When they are big enough not to climb out of the chicken tractors we put them into the smallest tractor and watch them GROW.
The chicks will also need food and water. We get a little "waterer" rather than a dish as they are so small they could hop in and drown in a dish. We also give them a small feeder so they don't mess up the food so much. We feed them chick crumble for the first few days, then a little cracked grain (borrowed from the cattle) and then some mixed grain, until they are big and hungry. After a few days they can also have a little greenery, such as grass, lettuce or silverbeet. When the chicks first hatch they don't need food and water right away, they can stay in the incubator for 24 hours to recover in the nice warm environment before they go into their new brooder box. As soon as the chicks go into the box we try to teach them to eat by tapping the floor of the box with an index finger as if its a chick pecking at the food. When we see them start to eat we know that they're going to be ok. This is best when there are a few chicks, as at least one will be smart enough to figure it out so that the others can copy, with one chick, you just have to hope he's a smart one. I also show them the water by putting a drop on my finger and putting on the chick's beak.
After a couple of weeks, you can usually tell the males and females apart, particularly if they are all the same age and the same breed, all the males will have little tails earlier than the females, and larger combs and wattles. If he have a big hatch, we will then separate the hens from the roosters. This lets the young hens get used to each other and makes it easier to put a small group of young hens in with the older hens later on, as they at least have some mates and won't get picked on so bad.
Do you raise chickens from chicks? Any tips?
Here's an update on raising chicks with a few more details.
We collect eggs in spring until we have enough for the first incubator run and aim to hatch about 12 chicks a season, so we do as many runs as we need until we have enough chicks (this should only take one run, but as I mentioned above, it hasn't been easy this year). The aim is to get about 6 new replacement hens and 6 roosters to grow up and eat (and maybe one to replace the old rooster or to sell), give or take a few, this seems to be about the right number. Roast chicken is a bit of a treat here, because its such an effort to kill and dress the birds for dinner, but when we do have them, they taste really good. Anyway, just thought you needed a bit of background info about the number of chicks we're talking about, now back to the chicks.....
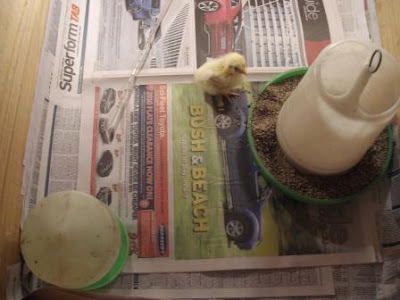 |
We usually have a problem with where to put the box. The shed is not insulated, so its too cold at night and too hot during the day. Outside on the deck is better, but its in killer Kelpie territory, so inevitably the chicks end up inside our tiny house, lately next to the TV! That's ok, except they can be very vocal, and sometimes its hard to hear the TV over all the cheaping coming from the brooder box!
I usually line the box with newspaper and change it every few days as it gets smelly. Then I put the newspaper in the compost bin, complete with chicken poo goodness (sometimes I also soak it in water first, as this helps it to break down, it also helps to rip it up quickly into smaller pieces, however the chicks often help by spilling their water everywhere anyway).
Depending on the time of year, the chicks only need the heat lamp until they have a few feathers. Particularly in summer, we can turn off the lamp after a week and after two weeks they can go outside in a small bird cage. I put them in the garden during the day (just in case the kelpies take an interest in getting the cage open) and out on the grass in the afternoon and then under cover at night. They seem very happy with that! When they are big enough not to climb out of the chicken tractors we put them into the smallest tractor and watch them GROW.
The chicks will also need food and water. We get a little "waterer" rather than a dish as they are so small they could hop in and drown in a dish. We also give them a small feeder so they don't mess up the food so much. We feed them chick crumble for the first few days, then a little cracked grain (borrowed from the cattle) and then some mixed grain, until they are big and hungry. After a few days they can also have a little greenery, such as grass, lettuce or silverbeet. When the chicks first hatch they don't need food and water right away, they can stay in the incubator for 24 hours to recover in the nice warm environment before they go into their new brooder box. As soon as the chicks go into the box we try to teach them to eat by tapping the floor of the box with an index finger as if its a chick pecking at the food. When we see them start to eat we know that they're going to be ok. This is best when there are a few chicks, as at least one will be smart enough to figure it out so that the others can copy, with one chick, you just have to hope he's a smart one. I also show them the water by putting a drop on my finger and putting on the chick's beak.
After a couple of weeks, you can usually tell the males and females apart, particularly if they are all the same age and the same breed, all the males will have little tails earlier than the females, and larger combs and wattles. If he have a big hatch, we will then separate the hens from the roosters. This lets the young hens get used to each other and makes it easier to put a small group of young hens in with the older hens later on, as they at least have some mates and won't get picked on so bad.
Do you raise chickens from chicks? Any tips?
Here's an update on raising chicks with a few more details.
By the way, my chicken eBook is now available if you want to know more about backyard chickens and using chicken tractors. More information over at the chicken tractor ebook blog. Or you can get it directly from my shop on Etsy (.pdf format), or Amazon Kindle or just send me an email eight.acres.liz {at} gmail.com.
What's the eBook about?
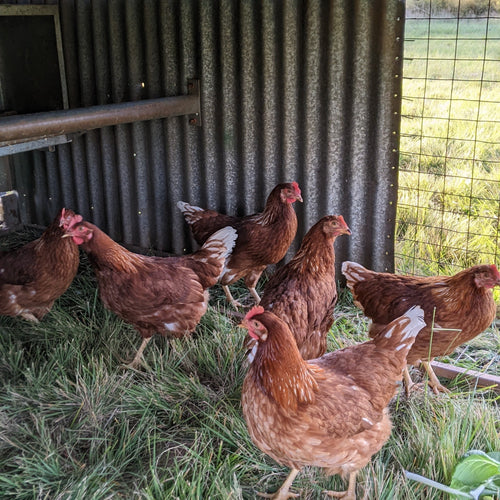
Chickens in a confined coop can end up living in an unpleasant dust-bowl, but allowing chickens to free-range can result in chickens getting into gardens and expose them to predators.
A movable cage or “chicken tractor” is the best of both options – the chickens are safe, have access to clean grass, fresh air and bugs. Feed costs are reduced, chickens are happier, and egg production increases.
But how do you build a chicken tractor? What aspects should be considered in designing and using a chicken tractor effectively? In this eBook I aim to explain how to make a chicken tractor work for you in your environment to meet your goals for keeping chickens.
I also list what I have learnt over 10 years of keeping chickens in tractors of various designs and sizes, from hatching chicks, through to butchering roosters.
Reviews of the Design and Use a Chicken Tractor




Leave a comment