Homemade realfood muesli bars (granola bars)
During Plastic Free July we have been saving any single-use plastic that would normally be thrown away, so that we can assess at the end of July just how much plastic we consume and how we could reduce that. Throughout the month I also tested ways that we may reduce that plastic as we go. This isn't a competition, its a learning experience, so its not cheating if you start to change some of your routine as you realise where all the plastic is coming from.

One thing that I knew was going to be an issue for us was muesli bars (granola bars for those in the US). We go through around a box of 8 per week, and at over $4 a box, they're not cheap. The brand that I buy is in a cardboard only box, but the bars are individually wrapped in plastic. I don't think that there is any alternative bar that we could buy that is not individually wrapped, so I started to think about making an something similar at home (also because I bought kgs of organic rolled oats in bulk and haven't eaten as much porridge as expected!). It had to be something quick and simple, part of the appeal of these bars is that they are easy to grab for a snack, we take them to work and for lunch when we're working on the farm.
As usual, when I started looking for a recipe I found a few different options:
The unsoaked oats muesli bar recipe is just like what we buy, its probably the quickest and easiest option, just combine the ingredients and form into bars. I know I said I wanted the easy option, but I also think if I'm going to make it myself, I should try to make it better than what I can buy. I find that if I eat the bought bars too often I start to feel bloated. This is probably due to oats being unsoaked.
As I've written previously, I try to either soak, sprout or ferment any grains that we eat, including flour in cakes and bread, and rice and quinoa before cooking. I also soak oats when I make porridge. To soak oats I combine the oats with water and a little kefir about 12 hours before I need to use them. Soaking the oats is said to reduce the phytic acid content and increase the nutrient availability, and I prefer to soak long enough that the oats are starting to lacto-ferment, just to be sure. Maybe its true, maybe its not, nobody seems quite sure, but I know I can digest oats more comfortably when I soak them, and that's the main thing!
Given the choice between a cooked and an uncooked recipe, I will always chose uncooked, as that means that more of the enzymes, vitamins and probiotics (from the kefir) are not damaged by the higher temperatures. Also we own a dehydrator anyway, so its really no extra trouble to use that rather than the oven, its actually easier, because I can fit more into the dehydrator and I can just turn it on and walk away, I don't have to remember to get multiple trays out of the oven. I do draw the line at soaking and then drying the oats AND then making them into bars. That just seems like too much work.
The recipe I tried
I decided to try the first soaked, but uncooked, oats recipe, with a few adjustments to fit in with the contents of our pantry.
4 cups of rolled oats (organic), soaked overnight in plenty of water and 2 tbsp of kefired milk
2 cup desiccated coconut (organic)
4 cups of nuts and seeds (I used 2 cups of chopped peanuts, 1 cup of chopped walnuts, 1 cup sunflower seeds (organic) and about half a cup of chia seeds (organic))
1/2 cup coconut oil (organic)
1/2 cup of honey (raw)
pinch of sea salt
I tipped the oats into a large sieve to drain while I chopped the nuts in my food processor, and warmed the coconut oil and honey in a small pot. I then combined about half the oats with half the nuts/seeds/coconut and half the oil and honey (and the salt). It was just too much mixture to deal with all at once!
I panicked when I saw all the mixture, and decided to cook half of it in the oven and half in the dehydrator. In case I ruined the whole lot in the dehydrator. The mixture was so wet I had no confidence in the dehydrator's abilities!

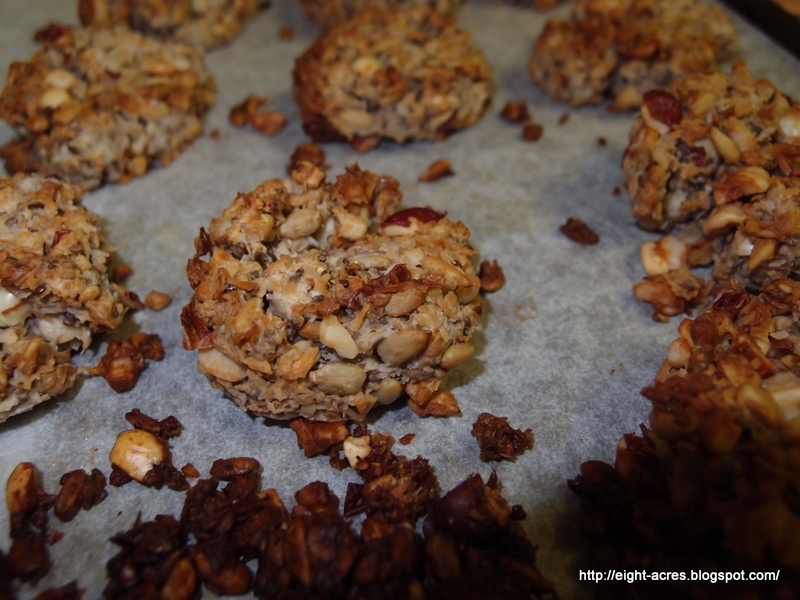
I rolled the mixture into balls and squashed them down into round biscuits, as I couldn't get a bar shape to work. I cooked half the mixture in the woodstove, at around 180degC for about half an hour, and the other half in the dehydrator at the hottest setting (75degC) for about 12 hours. The woodstove 'bars' came out first, and were golden brown, the honey starts to caramelise, and nuts were a little roasted. They were delicious, so I wasn't so worried if the dehydrator was a disaster.
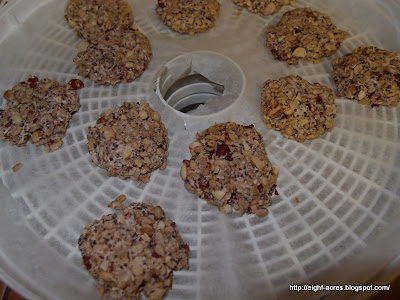
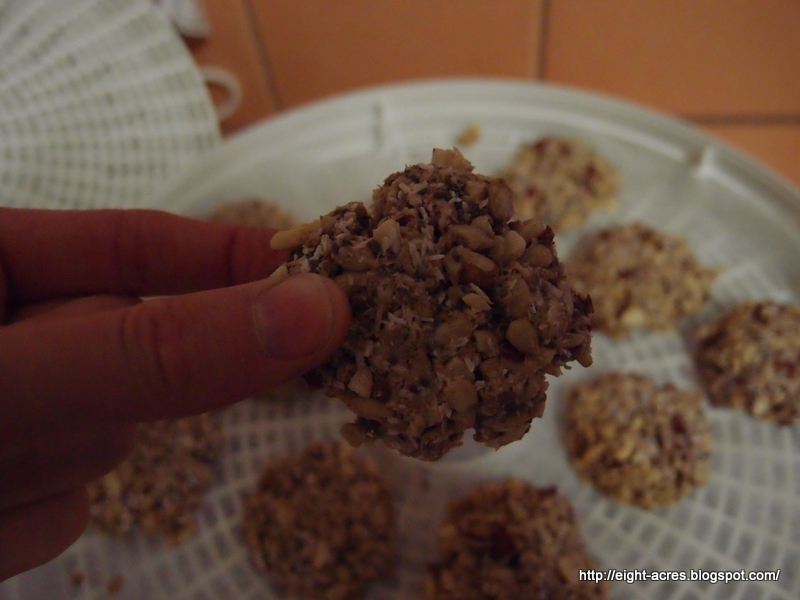
I was very surprised to open the dehydrator and find that the bars were perfectly dry and also nicely stuck together as a bar. They are a little brittle for Pete, he would prefer them chewier, so I will try the 55degC heat setting next time, which is probably better for enzymes and probiotics anyway. The raw bars had a slightly different taste, but I liked them. Both versions were a little sour from the fermentation, which nicely offset the sweetness of the honey.
The oven bars, once they had cooled, were kind of soggy on the bottom, and I put them back in the woodstove overnight with the door open, and that helped to dry them out (so that they will last longer). (And I forgot that Chime the dog sleeps next to the woodstove, and she must have helped herself, as there were a few missing in the morning!)


One thing that I knew was going to be an issue for us was muesli bars (granola bars for those in the US). We go through around a box of 8 per week, and at over $4 a box, they're not cheap. The brand that I buy is in a cardboard only box, but the bars are individually wrapped in plastic. I don't think that there is any alternative bar that we could buy that is not individually wrapped, so I started to think about making an something similar at home (also because I bought kgs of organic rolled oats in bulk and haven't eaten as much porridge as expected!). It had to be something quick and simple, part of the appeal of these bars is that they are easy to grab for a snack, we take them to work and for lunch when we're working on the farm.
As usual, when I started looking for a recipe I found a few different options:
- Unsoaked oats - uncooked - much like what we buy anyway
- Soaked oats - cooked - more like a cookie than a bar as it also contains flour
- Soaked oats - uncooked (and with more fruit)
- Soaked and dried oats - uncooked (and this one)
The unsoaked oats muesli bar recipe is just like what we buy, its probably the quickest and easiest option, just combine the ingredients and form into bars. I know I said I wanted the easy option, but I also think if I'm going to make it myself, I should try to make it better than what I can buy. I find that if I eat the bought bars too often I start to feel bloated. This is probably due to oats being unsoaked.
As I've written previously, I try to either soak, sprout or ferment any grains that we eat, including flour in cakes and bread, and rice and quinoa before cooking. I also soak oats when I make porridge. To soak oats I combine the oats with water and a little kefir about 12 hours before I need to use them. Soaking the oats is said to reduce the phytic acid content and increase the nutrient availability, and I prefer to soak long enough that the oats are starting to lacto-ferment, just to be sure. Maybe its true, maybe its not, nobody seems quite sure, but I know I can digest oats more comfortably when I soak them, and that's the main thing!
Given the choice between a cooked and an uncooked recipe, I will always chose uncooked, as that means that more of the enzymes, vitamins and probiotics (from the kefir) are not damaged by the higher temperatures. Also we own a dehydrator anyway, so its really no extra trouble to use that rather than the oven, its actually easier, because I can fit more into the dehydrator and I can just turn it on and walk away, I don't have to remember to get multiple trays out of the oven. I do draw the line at soaking and then drying the oats AND then making them into bars. That just seems like too much work.
The recipe I tried
I decided to try the first soaked, but uncooked, oats recipe, with a few adjustments to fit in with the contents of our pantry.
4 cups of rolled oats (organic), soaked overnight in plenty of water and 2 tbsp of kefired milk
2 cup desiccated coconut (organic)
4 cups of nuts and seeds (I used 2 cups of chopped peanuts, 1 cup of chopped walnuts, 1 cup sunflower seeds (organic) and about half a cup of chia seeds (organic))
1/2 cup coconut oil (organic)
1/2 cup of honey (raw)
pinch of sea salt
I tipped the oats into a large sieve to drain while I chopped the nuts in my food processor, and warmed the coconut oil and honey in a small pot. I then combined about half the oats with half the nuts/seeds/coconut and half the oil and honey (and the salt). It was just too much mixture to deal with all at once!
I panicked when I saw all the mixture, and decided to cook half of it in the oven and half in the dehydrator. In case I ruined the whole lot in the dehydrator. The mixture was so wet I had no confidence in the dehydrator's abilities!

The oven bars, once they had cooled, were kind of soggy on the bottom, and I put them back in the woodstove overnight with the door open, and that helped to dry them out (so that they will last longer). (And I forgot that Chime the dog sleeps next to the woodstove, and she must have helped herself, as there were a few missing in the morning!)
I think that the bars were a success, they certainly taste good. They were pretty easy to make, and one big batch should fit in the dehydrator, so its really just some time in the morning or evening before to start the oats soaking, then mix up the the rest of the recipe and put the balls into the dehydrator. Turn on the dehydrator for 12 hours, and then remove the finished product. They seem to last for a few weeks if they're dried out enough.
Did you have any food challenges in Plastic Free July? Have you ever made muesli (granola) bars?

Share this
Recent Posts


eBooks By Eight Acres
View all


Related Posts
-
5 tips for growing your own veggies to save on your food bill
While mindlessly scrolling Facebook I saw a post which was an article from 2017 that had been reshared. The title of ...
-
Eight Acres Soap is Different!
The mass-produced soap that you buy at the supermarket likely contains all sorts of synthetic colours, fragrances and...
-

We put solar panels on our shed roof
We have been talking about getting solar for about 10 years and last week our electrician came to set up our new syst...
-

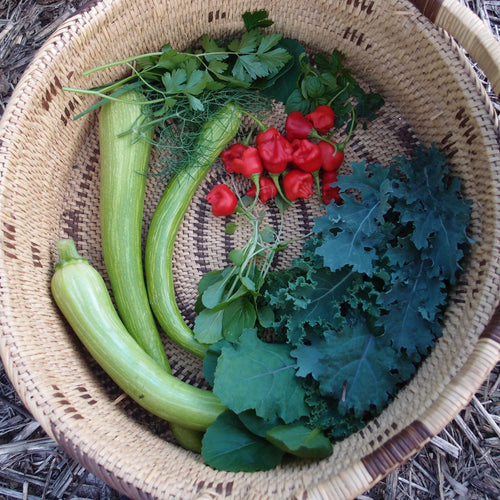
Weird vegetables in my sub-tropical garden
I've had some questions about the weird vegetables in my sub-tropical food garden, so here are some details for you. ...
-

Where should I start with a new property?
I got a question from a reader about where to start with a new property. Pete and I have started two new properties ...


Leave a comment