How and why make natural beeswax wraps
Since I have been keeping bees and selling our beeswax I have been getting questions about making beeswax wraps. Many people are buying beeswax to make beeswax wraps, and wanted to know more about it. I owned a few beeswax wraps, but I had never made them myself! It has been on my list of things to try for a while now, and over the Christmas break I finally had time to make some beeswax wraps, so now I can tell you all about it.

What are beeswax wraps?
A beeswax wrap is a piece of cotton fabric infused with beeswax (usually also with gum rosin for stickiness and jojoba oil to make it flexible).
Beeswax wraps can be used instead of plastic wrap/glad wrap/cling wrap or aluminium foil to keep food fresh both in the fridge and in the pantry. You can wrap individual food items in the beeswax wrap or use the wrap to seal a container.
If you want to reduce the amount of rubbish, particularly plastic rubbish, that you produce, then beeswax wraps are a great place to start. They are reusable many times over. And when they are worn out they can be composted as they are made entirely from natural materials.
Beeswax wraps can last for several years. This all depends on how much you use it and how you care for your beeswax wraps. Eventually the wax layer will crack and wear thin. You can either dip the wrap in beeswax mixture again to refresh it or put it in the compost.
How should I clean my beeswax wraps?
Beeswax wraps should be wiped clean with a warm soapy cloth. They cannot be washed in HOT water or in the dishwasher as the beeswax will melt. They should then be allowed to air – dry. And stored in a drawer/cupboard, away from sunlight and hot surfaces.
Things to avoid:
- Hot water or hot surfaces (including hot food)
- Dishwasher and microwave
- Wrapping raw meat (they can be used to seal a container though)
Can I make my own beeswax wraps?
Yes! It was surprisingly easy to make them and way cheaper than buying them. I only had the set of three beeswax wraps that I bought and I use them all the time. If you make your own you can make a large amount and always have one ready to use (and some to gift). All you need is cotton fabric, beeswax and optional gum rosin and jojoba oil.
There are a few different methods that people use to infuse the fabric with the beeswax mixture, including irons, sandwich presses, oven or electric frypan.
Cotton Fabric
Firstly, let me tell you more about the ingredients. You can use any thin woven fabric (not stretch) and ideally cotton/linen/hemp or any natural fibre, as it can be composted.
If you happen to have a stash of random fabric and most of it is from op shops (not looking at anyone in particular) then the best way to check if it is a natural fibre is to cut off a small strip and (carefully!) burn it. If it melts you have a synthetic fibre, if it smoulders and goes out you have a natural fibre (more info here).
I simply raided my stash for pretty fabrics, especially quilting fabric and pillow cases, which are a nice weight for beeswax wraps. If you cut the fabric with pinking shears you should prevent fraying.
Beeswax
The only other essential ingredient is beeswax. You are best to buy beeswax directly from a beekeeper. It will be the cheapest and the least processed option. The beeswax should be yellow-ish, anything from a light tan through to a bright orangey-yellow is all normal beeswax colour. If its white then it has been bleached.

If you can buy beeswax in smaller pieces it is easier to work with, as its really hard to cut from large blocks. I melt large blocks in a dedicated messy pot in my shed, and pour it into ice-cube trays so that I have small quantities to work with and easily weigh out the amount I need for a recipe.
Gum Rosin
The next ingredient, gum rosin, is optional, but it helps to make the finished wrap sticky. That way the wrap will stick to itself and stick to containers, more like familiar gladwrap.

I have seen a number of recipes that confuse rosin with resin. One of the benefits of being a Chemical Engineer is that I once did work experience over my summer holidays at a facility that produced rosin (among many other products) so I know what it is! That facility took by-products from the Paper industry and refined them into useful products, including rosin, pine oil and gum turpentine.
Gum rosin is also produced from forestry waste (i.e. stumps and branches not suitable for milling or paper). It is used to make adhesives and many other products. Gum rosin is derived from resin, but it is a completely separate product. You cannot just harvest your own resin and get the same result.
Some people choose not to include gum rosin because of concerns about sustainable forestry practices (in this case I would argue that you must also stop using paper and cardboard – trees are not harvest just to make rosin).
Others are concerned about the safety of gum rosin as it does have a hazardous warning on the safety data sheet – this is due to inhalation of the powder or fumes over a long period. Personally I think it is perfectly food safe, in the same way that my wooden chopping board is food safe. I wouldn’t eat my chopping board, but I don’t mind if it touches my food.
As gum rosin is a relatively unfamiliar material for most people (I know I wouldn’t have thought to put it in wraps if I hadn’t seen a recipe, and I had actually worked with it before!), I think this also makes people reluctant to source and use gum rosin in beeswax wraps.
I bought a bulk amount as I wasn’t sure how many wraps I would want to make, I have put the excess in my online store to make it easier to buy small amounts to make a few beeswax wraps if you want to give it a try.
You can buy my gum rosin here.
Jojoba Oil
The final optional ingredient is jojoba oil. This will make the beeswax wraps more flexible, as beeswax can be brittle. Jojoba oil is a relatively common oil and should be easy to source online or even at some chemists. You can substitute another oil like coconut oil if you can’t get jojoba oil, however do some research as I've read that other oils can leave a film. Jojoba oil is technically a wax, and it seems to be the best option for beeswax wraps.
DIY Beeswax Wrap Blocks
If that all sounds like way too much work, you can also buy the beeswax/rosin/jojoba pre-mixed in solid blocks.
You can buy my DIY Beeswax Wrap Blocks here.
How to make beeswax wraps
I chose to use Method 3, however, I will share some links for the other methods. Having worked with beeswax for some time, I know that it is quite messy. When it is melted, it will splash and then stick to things when it cools.
I certainly wasn’t going to use beeswax in my new kitchen! I didn’t want it in my oven or near my iron. However in my old kitchen I wouldn’t have worried, so choose the method that works best for you and be prepared to clean up the mess.
Method 1: Oven Method
In this method you melt the mixture (I recommend a jar in a pot of water) and use a paint brush to paint it onto your fabric, which is on baking paper on a baking tray. You then put this in the oven to fully distribute the mixture. You then remove the wraps and hang them on a line to set.
Milkwood - doesn’t use gum rosin and grates the beeswax
Mountain Rose Herbs - good explanation of the different ingredients
Method 2: Iron Method
This method is similar to method 1, but this time you iron the fabric between two sheets of baking paper. I just wasn’t convinced that my iron or ironing board would ever be the same. Also this method seems to suit using grated beeswax only and I wanted to include gum rosin and jojoba oil in my beeswax wraps.
The Inspired Little Pot - grated beeswax only
1 Million Women - grated beeswax only
Our Permaculture Life - A variation using a sandwich press!
Method 3: Dipping Method
This is a less popular method, but I felt it was the right way for me, as I could more easily control the mess. In this method, you use an electric frying pan or crockpot/slowcooker, or other method to melt all the mixture so that you can dip the fabric directly into the mixture. I wouldn't use a pot on the stove as it will probably get too hot, although a double-boiler set up could work.
I had been gathering my materials and thinking about making beeswax wraps for some time when I saw an old electric frypan at our community share. I waited to see if anyone wanted it for cooking. Nope, no takers, so I decided to try it for beeswax wraps.
STEP 1: melt all the ingredients in the frying pan

STEP 2: Dip the fabric into the mixture when it has completely melted and combined. I used a stainless steel peg to keep hold of the fabric.

STEP 3: Pull out the fabric using the peg and let it drip into the frying pan until the mixture is set.

This was very quick and relatively mess-free. I did have the issue that I have when I make pancakes – hard to get the temperature just right as you need it hot enough that the liquid runs off leaving only a thin film, but not so hot that it starts smoking. Noting that the melting point of beeswax is 63°C and the melting point of rosin is more like 120-140°C, so depending on your ratios it needs to be around 80-100°C to get the right consistency.
This is not a great method for children as the frying pan does get hot (and I burnt my finger), it might be better with a slow cooker. I do recommend sourcing a secondhand appliance for melting the beeswax as you will never get it clean again.
And make sure you put down plenty of newspaper to protect surfaces from dripping beeswax. I used a large piece of cardboard as I didn't want the ink from newspaper transferring onto my finished wraps.
Beeswax Wraps DIY Recipe
This recipe makes 8-10 small-medium sized wraps and can be used with any of the above methods.
100g beeswax
20g rosin
10g jojoba oil

Now I have plenty of beeswax wraps, enough for my kitchen and some for gifts and I can answer all your questions about beeswax wraps!
So have you tried using beeswax wraps? Have you made beeswax wraps yourself?
2 comments
Share this
Recent Posts


eBooks By Eight Acres
View all


Related Posts
-
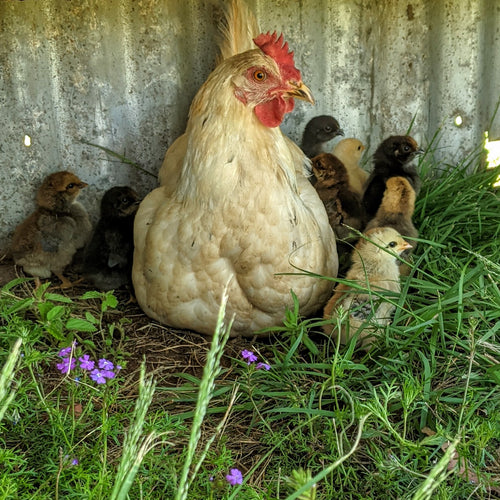
Hatching chicks - incubator vs mama hen
Over the years I've hatched hundreds of chicks using an electric incubator, but I never used a clucky hen to hatch ch...
-
We put solar panels on our shed roof
We have been talking about getting solar for about 10 years and last week our electrician came to set up our new syst...
-

Ten renovation projects you can start while in quarantine
Chances are, you’ve recently had to grapple with the reality of quarantine, or at least spending more time at home, a...
-

Pandemic prepping for non-preppers
In case you hadn't noticed... we are now dealing with a global pandemic of COVID-19. As countries are gradually closi...
-

Joel Salatin - adapting Polyface farming method for Australian conditions
When Joel Salatin came to Queensland... In August 2011 Pete and I left Nanango early headed for Beerwah (Sunshine Co...
-

Cooking with the sun!
I can't remember when I first came across the idea of using a solar cooker. Maybe in Grass Roots magazine or a prepp...


Hi Lynette, yes exactly, although its much cheaper if you buy it in bulk online! Cheers, Liz
Jojoba oil. Is it an oil that you can use on your body like moisturiser that you buy from chemist/body shops?
Leave a comment